
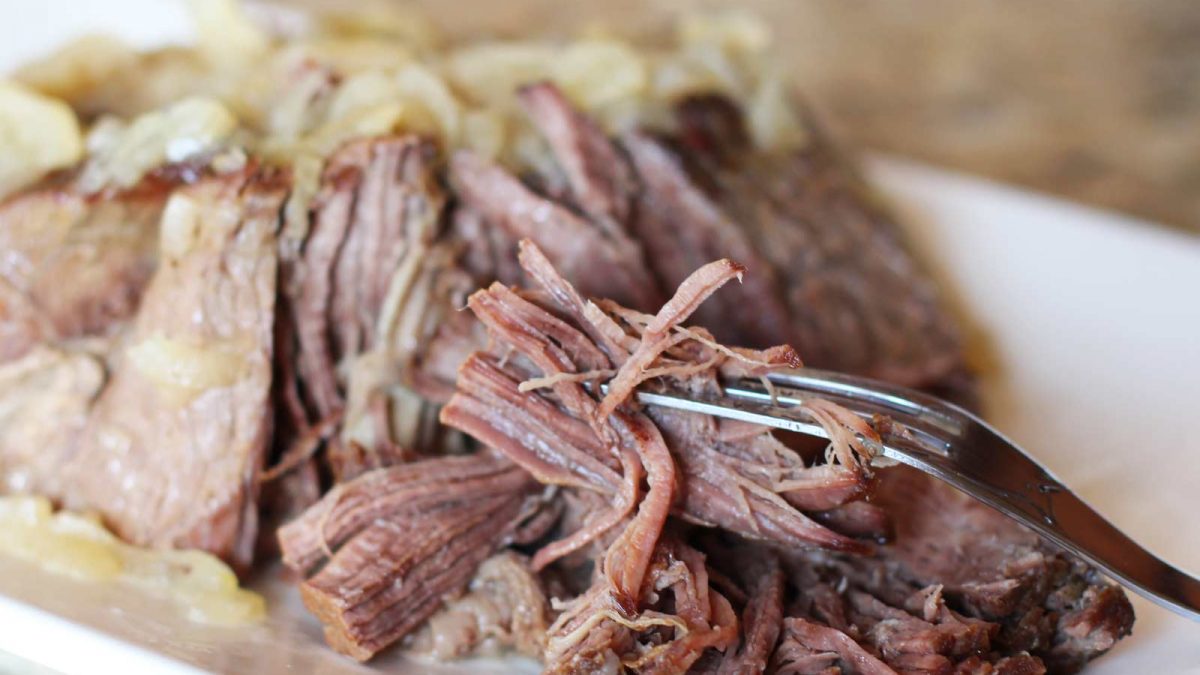
Fall-Apart Pressure Cooker Pot Roast
Ever since we got our hands on the amazing Instant Pot pressure cooker, it hard to imagine returning to our oven-lovin’ or slow-cookin’ ways. This indispensible kitchen tool has become our “go-to” for anything that would typically require an extended cooking time – from our popular whole Pressure Cooker Chicken… to soups, stews, vegetables and even large, tough cuts of meat.
This modern day pressure cooker operates with what seems to be magic: it speeds up the cooking process exponentially and yielding tender, flavorful gourmet results with the least amount of effort. Chicken is juicer… beans are the perfect al dente… and flavors pop like never before. We’ve taken a number of our favorite dishes – ones that we used to cook in the oven, on the stove or in a slow cooker – and tested them with unrivaled success.
Unlike the slow-cooker, a pressure cooker doesn’t let a smidge of tenderness or flavor escape. The combination of heat and pressure infuse meats with aromas that roasting could never do. This process also helps to gently break down the fibers in tougher cuts that typically take hours of cooking, making even the least expensive cuts buttery soft and fork-tender. The Instant Pot has even been proven to preserve nutrients that slow-roasting typically loses.
And it does it all in an hour or less. Whether window watching while you oven-roast or waiting the whole-day away for the slow-cooker, the deadline for dinner just became stress-free. Now the only pressure is under the lid.
Pressure Cooker Pot Roast: Tender Meat for Any Meal
In our quest to simplify the feat of getting a wide variety of delicious and healthy meals to your table (with the least amount of work, stress and cost), we recently put the pressure to the test with the iconic and oh-so-humble pot roast.
With standard methods of preparing this traditional meal, we found that the meat would often lack the depth of flavor we knew it was capable of. Sometimes, it just wasn’t as tender as it ought to be or the meat dried in the hours of heat. Finding that sweet spot between fork tender and flavorful meant watching the clock in hopes of catching it just in time.
With just a few trial runs adapting our favorite Slow Cooker Pot Roast recipe, we created the simplest, most flavorful and most tender pot roast we’ve ever enjoyed.
This recipe is perfect for a large family dinner. There are also plenty of ways to enjoy the leftovers throughout the week. This pot roast has found its way into Taco Tuesdays, over mashed garlic “fauxtatoes”, tucked into Paleo Keto Paleo Dinner Rolls for mini sliders, and quickly sautéed with broccoli and coconut aminos for Asian Beef and Broccoli. We’ve also folded this fork-tender beef into our make-ahead Paleo Egg Muffins for a protein packed personal quiche for those afternoon slumps or breakfast on the go.
Ok, enough talk… let’s get (pressure) cooking!
How to Master the Pressure Cooker Pot Roast (So Easy a 5 Year Old Could Do It!)
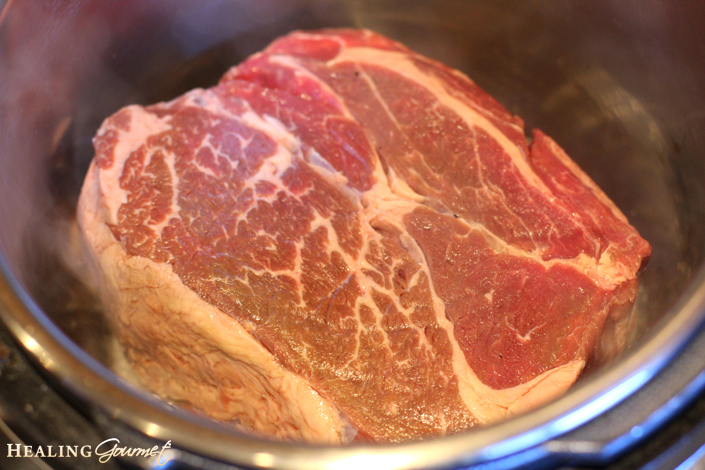
First, grab your ingredients. You’ll need a 3 pound grass-fed chuck roast, 1 medium onion, sliced, 2 tablespoons grass-fed tallow or coconut oil, a teaspoon of high quality sea salt and 2 cups water or bone broth.

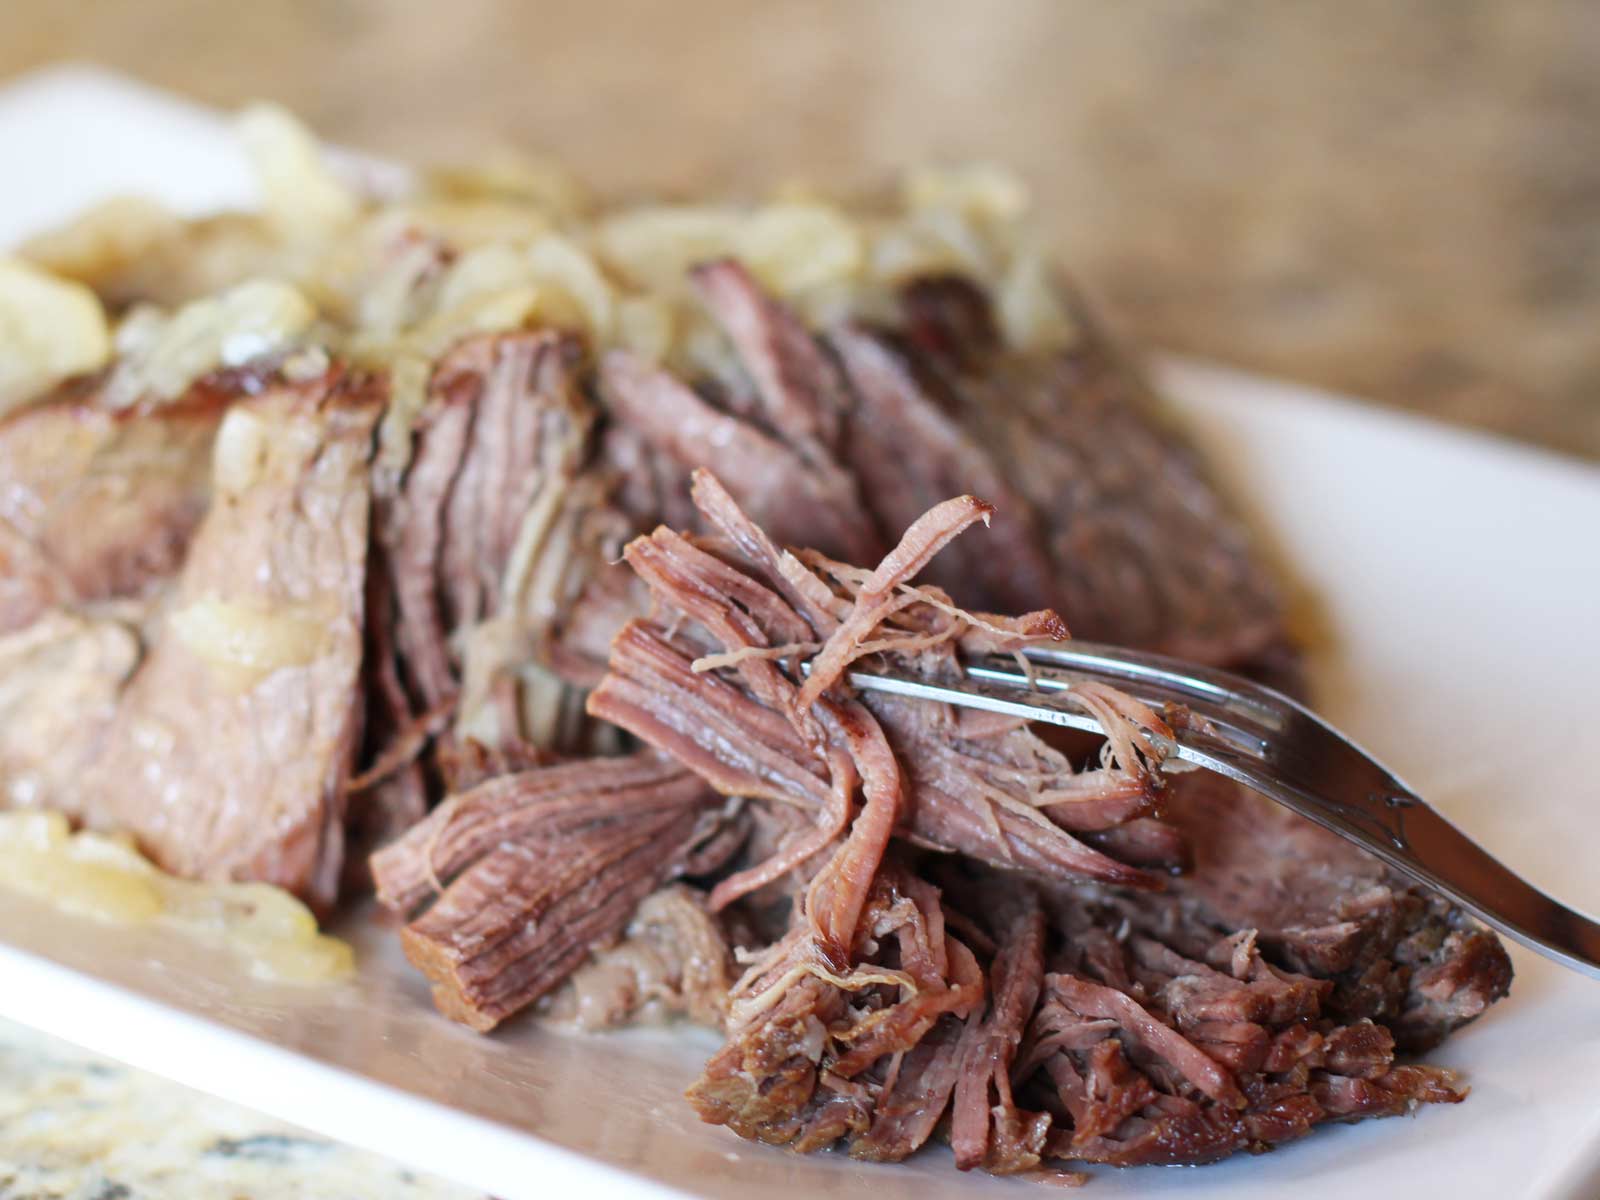
Like most pot roast recipes, searing the outside before cooking the roast will create what’s known as the Maillard reaction. This browning reaction between protein and sugar brings out those rich, caramel flavors that will soon be heightened by the pressure. It also helps to seal in the juicy goodness.
To do this, you’ll start by turning your Instant Pot to the “Sauté” option and adding the coconut oil or tallow. Once the fat is melted and up to heat, sear each side of the chuck roast just long enough until the meat is nicely browned.

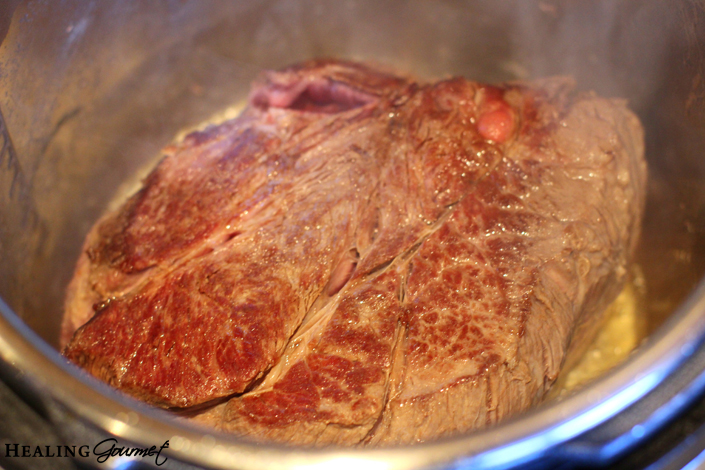
Once all sides are golden, sprinkle in the salt…

Add in your onion…

Pour in the bone broth or water…
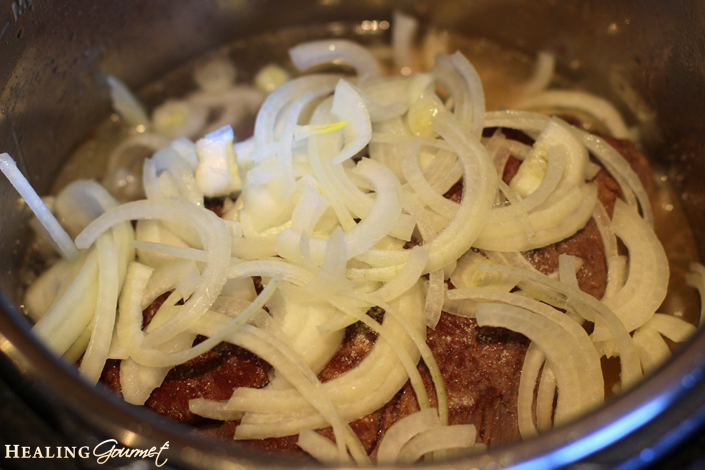
Close and lock the lid, set the timer to “manual” for 70 minutes, and let that pot roast float on in to tender town.

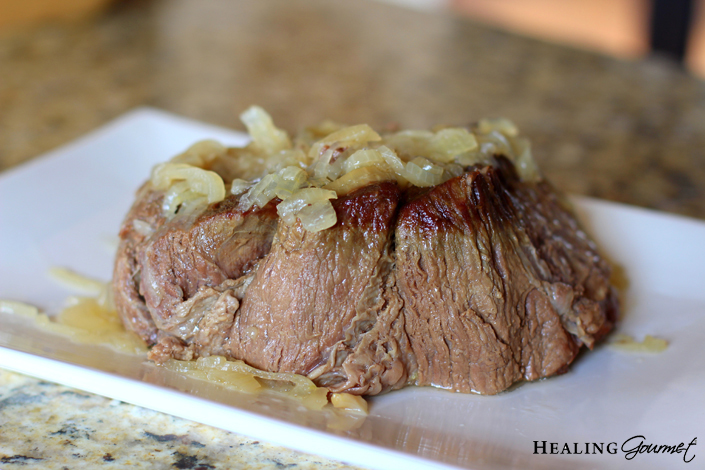
In a quick hands-off hour and ten minutes, you’ll open the lid to discover the richest, most shred-able pressure cooker pot roast with flavorful au jus for a classic home-style meal like never before.
Love Instant Pot Recipes?
Get Your FREE Instant Pot Paleo Recipes Book Here
Do you enjoy pot roast at your house? If so, we’d love to hear the many ways you enjoy it in your meals.
Fall-Apart Pressure Cooker Pot Roast Recipe
Fall-Apart Pressure Cooker Pot Roast
Ingredients
Tap an ingredient to check it off.
- 3 lb grass-fed chuck roast
- 1 medium onion, sliced
- 2 Tbsp. coconut oil or grass-fed tallow
- 1 tsp. sea salt
- 2 cups water or bone broth
Instructions
- Turn Instant Pot to Saute. Add the oil.
- When shimmering, add the pot roast. Cook 2-3 minutes to golden, then flip to sear other side.
- Sprinkle on the sea salt. Top with sliced onion. Pour in the water or broth.
- Close and lock the lid. Set Instant Pot to “Manual” and program for 70 minutes.
- You may do quick release or natural release.
Notes
Nutrition Information Per Serving
Nutrition Facts
Per serving- Fat15 g59%
- Protein22 g39%
- Carbs1 g2%
- Calories
- 226
- Total Fat
- 15 g
- Saturated Fat
- 7 g
- Monounsaturated Fat
- 6 g
- Polyunsaturated Fat
- 1 g
- Cholesterol
- 77 mg
- Sodium
- 479 mg
- Total Carbohydrates
- 1 g
- Dietary Fiber
- 0.2 g
- Sugar
- 0 g
- Net Carbs
- 1 g
- Protein
- 22 g
Jump-start “lazy” metabolism and burn fat ASAP
Do you know what happens when you combine:
- The World’s Most Effective Fat-Loss Diet
- The #1 Time-Saving Kitchen Tool and
- 100+ Delicious Fat-Burning Recipes?
What you get is a match made in heaven!
A proven way to jump-start your “lazy” metabolism and burn 12-20 LBS of pure fat in just 21 days…
While you enjoy MORE delicious meals and spend LESS time in the kitchen!
This is truly the fastest – and easiest – path to fat loss success.
Check out the deliciously-easy recipes and rapid body transformations here…




Great recipe.
Help! Just started up my power pressure cooker xl and I have no manual setting. Seared it on the range and then set pressure cooker on chicken/meat and tried to st manual time via cook time selector but no luck
I have a 10.5 qt by Elite and Sportsman Guide. I just discovered that when I press the selections for meat & chicken, I can add additional time by immediately pressing the label on the front that is labeled pressure cook time. Hopefully this will help. 🇺🇸
i have and old pressure cooker. how do i know how long to cook a rump roast that is 3lbs.
According to my pressure cooker cook book, a 2-3″ thick chuck or rump roast should cook for 30-40 minutes at 15 lbs pressure. Add 20% to the time if it is 10lbs. of pressure.
Could you add carrots & potatoes to the pot as well? I ordered my Instapot on Friday and it’s coming today! I’m so excited!
Cool as directed. Cool potatoes in with meat for 70 minutes, then add carrots (and mushrooms, in my house), then cook for 10 minutes. Enjoy.
Yes, they will add great flavor, but will be falling apart at the end of 70 mins. Maybe pull the roast at 70 mins, tent with foil, discard mushy veggies, throw in some new veggies, reseal and put it on manual for 5 more mins?
I have added large chunks or even whole potatoes (and or sweet potatoes) and whole carrots (fat ones) along with the onions and meat. The larger the chunks the better as they do cook faster than the meat, but even if they do get a little overcooked, they are delicious!
You can add. Anything you want to it. I did
Adding potatoes, carrots, celery, etc. Whatever you like, I’d quick-release pressure after about 50 minutes, add your whatevers, then continue pressure cooking for another 15-20 minutes.
I agree. I cook onions and garlic & some celery with the meat for 50 minutes. Then remove the celery & roast, immersion blend the leftover garlic and onion. Add the roast back with potatoes, additional onion, carrots, fresh celery and turnip. To thicken the gravy I use Wondera.
yes for sure you can add any veggies but remember the veggies take way less time. you would need to bleed off the pressure when theres 10-15 minutes left (depending how hard you prefer your veggies) then add your potatoes and carrots or anything else you like , then reseal and allow pressure to build till the safety valve pops up then time 10-15 minutes from there. if you add the veggies in from the start they will turn to literal mush so its not recommended
I have a grass fed Eye of Round… ugh…
I am going to try this recipe in my new IP-Duo 60. Trivet or not? Hope it comes out as tender. I know chuck can be fork tender because of all the fat. Eye of round is great but pretty impossible to get tender. I have a subscription to Butcher Box, which I love, BUT they tend to send tough pieces of meat regularly. Hoping the Instant Pot can help. Flavors are great in these cuts… tenderness hit or miss for me. Happy to have found your site.
Peace,
Disa
How did it turn out? I am looking for a way to cook and eye round roast, also.
I have used the following recipe in my IP with success. I am not 100% sure of the cooking time, because I’ve done it with different sizes of eye of round. The recipe is from here (in Portuguese, I’ve used Google Translate for English): http://www.aquinacozinha.com/lagarto-feito-na-panela-de-pressao/
EYE OF ROUND IN THE PRESSURE COOKER
Ingredients:
1 piece of eye of round (~ 3lb)
2 tablespoons oil
1 onion sliced
1 ripe tomato sliced
2 cloves garlic, crushed
1 tablespoon balsamic vinegar (or other vinegar)
1 tablespoon of salt
freshly ground black pepper (a pinch)
1 and 1/2 cup of hot water
Instructions:
– Heat the oil using the Sauté function in the Instant Pot.
– Place the whole eye of round in the pot and let it brown on all sides.
– Add the onion, the tomato, the garlic and let it sauté for a couple of minutes in the pot.
– Add the balsamic vinegar, salt and pepper.
– Add the hot water, close the lid and set the timer to “Manual” for 45 minutes.
– Let the pressure out (quick or natural release), remove the roast, slice it and serve the slices with the sauce over them.
* You can reduce the sauce in the pot using the Sauté function.
Thanks so much Marcia! My eye of round came out really good in the Instant Pot. There was just a touch of pink in the middle and I like mine on the rare side so next time I’ll lessen the cooking time a bit and do quick release.
Mine was a fail. Followed directions- simple recipe with 4 ingredients. Mine came out tough, tasteless, and kind of greasy. Veggies were mush. Going back to the crock for this meal.
I agree. Eye of the round needs low and slow in the oven. Instant
Pott was a flop!
Sous Vide does awesome with Eye of Round!
I have a Butcher Box eye of round in my deep freezer that needs love. Any chance you’ve nailed a recipe for it after all this time?
If I wanted to add potatoes and carrots to this what would I do? I’ve only used my IP once and it was to cook rice!
I would set the timer for 15 minutes less than the recipe says. Do a quick release, add the vegetables and get the lid back on as quickly as possible. Then set for 15 minutes.
Don’t cut your carrots as small as you want them. Cut them about the same size as the potatoes and then you can cut them up more after cooking.
I have started a document to let me know how long to cook things in my IP. If you vegetables are overdone, cut down on cooking time the next time or cut them larger. Also, my potatoes and carrots were room temperature.
I add my potatoes and carrots, on top of the meat, close the lid , and they come out great.
Fabulous recipe!! I needed one that did not include the veggies in the pot and this was amazing. I’ve tried a few other electric pressure cooker pot roast recipes and they just didn’t pass muster with my family, but this one is a winner. Thank you!
I’ll be moving to AIP very soon and won’t be able to do eggs. I wonder if anyone has tried using an egg substitute such as a gelatin egg for this and if it worked out the same? Sure wish I could do the tomatoes, too, as I love and miss them so much, but tomatoes aren’t so fond of me! I was very glad to hear of everyone’s different combinations as its given me different ideas to try out instead of the tomato.
There is no egg or tomato in the recipe. In the posted secondary recipe there is also no eggs. For that one, just leave out the tomato, or add a touch of celery for a different seasoning instead.
How about a 2 lb roast, what is the rule of thumb for different sizes?
Hi Darcy,
Please check the Instant Pot Cooking Time Guide. I usually scale using that as my guide, erring on the side of caution (cooking longer).
You can add any veggies you like, just know they will be really well done. Carrots and green beans hold up fairly well. Rest them on top of the roast and they should be fine. Don’t cut your potatoes really small. Big chunks work best.
Thanks for including us in your list, Ashley!
First roast I cook in my Instant Pot and I used this recipe.. it was absolutely perfect!! I’m going to have to start having dinner parties to show off my new cooking skills!! It was and is so simple to use this pot. Just following recipe’s like yours and I haven’t had a problem yet in all that I’ve tried.
I cooked my beef bottom round roast for 40 minutes, slow released pressure and it’s soooo tough! Like leather. Should I put it back in for 20 more minutes or more? Help. I want to like the Instapot but, right now, don’t love it!!
I’ve had the same issue with my IP. I can’t remember the size of my roast, but I followed the instructions according to the weight of the roast. And the meat was tough. Idk what the issue is; I’ve read elevation effects pressure cooking BUT I live way below sea level so pressure cooking should actually be quicker for me. Anyhow I’ve found that 1 to 2 hours (usually 2) on manual has worked best for me no matter the size or even type of protein. I know kinda late, but hope that helps.
40 minutes is not long enough for bottom round. At least 60 for small roast and up to 90 for larger. Then I leave on keep warm for an hour or moreThey turn out very tender. Remember with this cut cut you can’t overcook but you can undercook.
Thank you Bette, I wanted to do a bottom round and you answered my question 🙂
Thanks Bette! I have been looking for bottom round instructions! $14.00 in meat-do Not want to waste it!
I followed the Instant Pot recipe, which said to cook the meat for 30 minutes with a 15-minute natural release. I took the meat out and then put the vegetables in for a 5 minutes pressure cook. The meat was done, but not as tender as I hoped. From what I read here, 30 minutes is too short of a time. I will try the longer cooking time. Thanks to Kelley for the recipe!
I think you’ll love it with the extra cooking time, Kathy!
Thanks for this great recipe! Just out of curiosity, what is the difference between the “Meat/Stew” setting and “Manual”? I am bookmarking your page.
You can also take whole potatoes, prick with a fork, rub skin with butter & sprinkle with kosher salt. Wrap in foil & place on top of roast. Perfect, delicious baked potatoes.
I am recovering from abdominal surgery and could not lift my two (one within the other) heavy cast iron Dutch ovens. Decided to try this recipe and the meat is fall-apart-tender as promised. I just put five large peeled, cut-up, carrots and 7 smallish potatoes into the broth and will now pressure cook those for 15 minutes.
I think your picture shows 7 hours instead of 70 minutes.
Hi Irene,
Do you have the Instant Pot? That is what mine looks like with 70 minutes.
Its my understanding that quick release almost guarantees tough meat. Always use natural release when cooking meat in a pressure cooker.
Helpful tip, thanks Frank! I will do a back to back experiment on two cuts of the same meat and see what “tenderness score” we get for each.
Did you get a chance to check this?
This article breaks down when one should use Natural release vs. Quick Release — https://www.pressurecookingtoday.com/quick-pressure-release-or-natural-pressure-release/
Basically, if it foams (oats, rice, etc) or is a large chunk of meat, do Natural Release.
So far I haven’t had very good luck with my instant pot. The first roast I cooked was 3 lb chuck roast, 2c broth, natural release, after 45 minutes it was 200 degrees and basically leather ? I’m very nervous to leave it in for 70 after seeing the results of the first or will the longer time help the meat to fall apart? Thanks in advance for your help! I’m still a novice cook and instant pot is a whole new ball game.
The longer in a pressure cooker the more tender. You need the time and pressure to break down and renderixe those tough fibers. You need liquid to create steam for the entire 70 minutes. The recipe does work.
Thank You, I am always unclear about times and don’t want to ruin my roast
Even in a dutch oven on top of the stove many roasts get soft (but they are not fully cooked yet) and then go to a tough stage and then after that they really start absorbing the liquid and get very tender. You have to get past that tough stage. The only way it will get tougher by cooking too long is by roasting in high oven or over fire until it just chars into leather.
Thanks for the recipe! Is there a particular reason you season (with salt) the chuck roast *after* searing it rather than beforehand?
One other question: how many minutes would you add, if any, if we have a chuck roast that’s 4.5lbs?
I realize this is a 2016 post, a bit old, but also that there has been a bit of traffic on this in 2017. Actually I’d like to repeat a question I didn’t see answered from January – why using the Manual setting rather than Meat?
I’m wondering the same thing. Hope someone answers the question.
Hi Wendy & Ky,
The manual setting just gives you more control. With manual, the default pressure is HIGH and you choose how much time you want. The Meat setting is pre-programmed for HIGH pressure and 35 minutes.
Enjoy!
Kelley
Mine will not let me set the pressure low medium or high, it just stays at medium.
Try pressing the ‘Pressure Cook’ button to see if it toggles between low, medium, and high, if those settings are options on your machine. If it only has a ‘medium’, yeah, OK, then it wouldn’t. Hope you can find the ‘high’ if you have the option!
Thanks
I followed this recipe as suggested using a 2# roast….no change of cooking time. It turned out great! Husband commented several times how tasty this was and asked for more onions to be added next time.
Looks like a really good recipe. I’m having a hard time reading it, though, because of the ads on the side. I have to copy and paste it into a new document to read it fully. Thanks for the recipe. I can’t wait to try it.
Hi Rhonda,
You can just click the “Print” button on the recipe and it will give you a page with the recipe only. I hope you enjoy!
Be Well,
Kelley
I added a rutabaga along with the onions, and they came out perfect! I’ve never managed to cook them to my satisfaction before…and, they had a good flavor from the stock.
Trivet or no trivet?! I know in my slow cooker it scorches of I have it directly on the pot. Same for pressure cooker?
This turned out SO delicious. I used none broth (as optional inthe recipe). This recipe is a keeper. Thank you!
Delicious and simple! Thanks for the recipe. Best pot roast I have ever made. Whole family loved it. I used a 3.1 lb rump roast, used bone broth as the liquid, cooked for 80 minutes then natural pressure release. Meat was deliciously moist and tender.
I have eight pounds of meat to cook. what would you suggest for time adjustment?
I made my 3# chuck roast yesterday. Followed the recipe exactly. I was unsure about putting the meat on the rack (that came with the pot) or leaving the meat on the bottom of the pan. I chose the former (on the rack). It came out a little dry (70 min). So, if your recipe doesn’t mention the rack, does that mean that the rack isn’t used? Thank you.
Hi PJ,
No rack. You can see in my instructions (and in the photos) no rack was used. This will improve hydration. The rack is more for steaming (eggs, vegetables, cheesecakes, etc).
Be Well,
Kelley
Can you give me a approximate time that it takes to use natural release?
Just a few minutes. Simply turn the valve after the time elapses and it should be ready to open in 5 minutes or less.
I made this tonight for dinner. Fantastic. Used natural release which I read is best for beef roast so the meat doesn’t seize up. We ate it in tacos. Also, I seasoned the leftover juices and all saving for on soup. Delish.
How long was the natural release? TIA!!
I had a 3.3 on bottom round roast. I added 10 minutes to the cooking time and because I was not at home, it naturally released for over 50 minutes. The meat was still tough on the inside And barely falling apart on the outside. My IP is new to me and I don’t see a “manual” button…is it called something else on the DUO 8qt? I used the meat/stew button, but if you push the button twice it changes to high pressure. What did I do wrong? Almost every recipe I’ve tried has required me to put the meat back in and cook for additional time. Aahhhhhh! I love to cook and am a good cook and I’m wondering if the IP wasn’t that great of a purchase…or I just need more time getting to know it? Help in Idaho!
Hi Jo,
Howdy neighbor! Help here from Utah. I bet I know what happened 🙂
The “Manual” button allows you to control pressure (HIGH or LOW) and time. Since you say you don’t see a manual button, it sounds like you may have cooked it at LOW pressure. This is the only thing I can think of that would cause a tough result. Since many recipes will specifically call for HIGH or LOW pressure – for example, low pressure is wonderful for eggs and meatballs as they are delicate; high pressure is great for tough cuts of meat – you need to determine how to manipulate your pressure setting. I think this will fix your issue.
Be Well,
Kelley
I have the new ultra and my manual settings were on high pressure. I did 1 hr 20 minuets to make sure, but my 2.8 lb grass-fed roast is still tough.
Instead of manual, it just says “pressure cook.”
Hi, I just got my instant pot and am still learning. Can you start with a frozen roast and if so, how does it affect cook time?
Is it ok to use olive oil or another oil in place of the coconut oil/tallow?
Yes, but please choose a stable fat like avocado oil. Olive oil is too delicate and has a low flash point which generates carcinogenic lipid oxidation byproducts (LOPs) when heated above its flash point.
So…maybe it is a dumb question, but why call it a “pressure cooker” recipe, if it’s for Instant Pot? I don’t have an instant pot. I have a pressure cooker. Like, I understand that pressure cooking is something that the IP does, but it’s not a “pressure cooker.” And, again, maybe I’m just silly and I use the same time and cook on high for 70 minutes, but that seems really long to me. Ugh!
Hi Hannah,
The Instant Pot is definitely a pressure cooker.
Most tough roasts take 3 hours of braising to get tender. With this method you get the results in roughly 1/3 the time.
Kelley
Instant Pot is an “electric” pressure cooker, not the same thing as a stove top pressure cooker…
Is it possible to cook a frozen roast in the instant pot or is it recommended to thaw first?
I have cooked a frozen 3 lb pork loin on high for 40 minutes and it turned out great.
My IP doesn’t have a “Manual” setting. What should I use instead? I have the IPDUO.
I believe that the “Pressure Cook” button has the same function as the Manual button on other models.
I’m using a 2# usda chuck pot roast from Randall’s. Lucky for me it was marked down to $7 lol. I realized I didn’t have beef broth so I used chicken broth and Rosemount Shiraz. I also added some seared garlic l, fresh thyme and fresh rosemary. Lucky for me I still had 2 red potatoes.
Can you make gravy out of the liquid after cooking? If so, how would I do that? Thanks
Sure! Remove roast to a serving dish. Strain the broth and return to the pot. Add a little arrowroot – 1/2 tsp to 1 tsp. and whisk over heat (Saute function). It will continue to thicken when you remove from heat, so don’t add too much arrowroot.
I also just bought an Instapot and am having trouble with the meat getting tender in time recommended.
I tried a 3lb pork shoulder last week and ended up eating 2 hours past dinner because I had to double the time to get it tender enough. I tried last night with 4 lbs of grassfed beef short ribs. Recipe said 45 min on high and natural release for 15 min. Again the meat was tough so I cooked for another 25 min. Should have done another 45 min as they were not as tender as I would have liked, but we ate them. I’ve also tried chicken breasts and they were perfect with the amount of time suggested. I bought a lot of grassfed beef and my 3lb chuck roast is next. Your recipe is the first time I’ve seen a 70 minute cook time. I hope that does the trick.
Thanks
Hi Jane,
I’ve tried lots of recipes that haven’t gone long enough, leaving me with a tough cut. I test my recipes at least two times to ensure I get the right tenderness (not tough, but not mushy either). I’ve found 70 minutes is the perfect time for this dish. I hope you enjoy!
Kelley
I added radishes to this recipe (Keto) and it was delicious!! The radishes actually tasted a lot like potatoes. Making this again as I type. Added more radishes and onions this time.
LOVE this idea! Thanks for sharing Carman.
This is a stupid question but what is the natural release. I have an ip also and I just release the pressure through the valve. Is there another way?
As the pot cools, the pressure will start to go down naturally, without you touching the valve at all. Depending on what you’re cooking and how much liquid you have, natural release time can vary. Can be as little as 5-10 mins, or as much as 25-30. I’ve seen people have it take even longer. A good rule of thumb I’ve heard and have had success with, is let your meat natural release for like 15 mins or so – it’s like when you let it rest after cooking on the stove. Releasing all the pressure right after cooking can cause your meat to get tough. After that time you should be ok to vent the rest of the pressure yourself, if there’s any left.
Best pot roast I’ve had in years! Used a 3.5 lb rump roast and followed instructions exactly with a natural release (about 25 minutes)
I also put carrots in but cooked the potatoes on the stovetop separately. I will definitely use this recipe again. Thanks so much!
Thanks so much for taking the time to comment, Sinead. And really happy you enjoyed it!
I’m making this as we speak, smells wonderful! Definitely, definitely use the natural release at the end! It totally changes the texture of the meat. I have been using pressure cookers for years but was never really happy with beef or pork textures. I recently read about making sure to use NR, and it changed my world. I will never use any other release technique for my beef and pork! See, old dogs can learn new tricks (or at least old chicks can).
I have a Cosori Pressure Cooker. I’m not a pro at using this, but I think when I use the manual mode, in addition to adjusting the time, I can either choose to adjust the pressure, or the temperature. Not both though. We will see how it turns out.
I love the instant pot, could i use cooking wine or any red instead of broth or water?…maybe throw some celery in it?…
I like the way you think! A nice red wine would be wonderful in this, I think.
If you add celery, it will add flavor, but after the cooking it will likely be green mush. Dried herbs are my go-to.
No one ever tells how long you should cook roast per pound, and it is defiantly different as you increase the weight. Can you give that number?
I Made this Tonight for dinner…I didn’t have bone broth So I used Low Sodium Beef broth. It was Absolutely Wonderful. Tender & Juicy.
I Will Definitely Be making it Again.
Great Recipe!!
Excited to try this as my first IP recipe (2 weeks on Keto diet and excited to try Keto friendly recipes). Can you tell me how many servings this made?
Hi Jennifer!
Thanks so much for your comment and interest in our recipe.
The nutrition is for 12 servings (each with 4 oz).
Please let us know how it goes!
Kelley
Your site is obnoxious to try to pay attention to with the “Featured Recipes” and “Popular Articles” columns zipping by the right-hand side. I hated it enough to tell you before looking for a recipe elsewhere.
Hi Joy,
Ironic name. Are you always so negative about petty things… on websites that provide valuable, 100% free content to you? “Hate” and “obnoxious” are very strong words.
I’m sorry that you don’t like the sticky sidebar that provides our visitors with an easy way to access our most popular content.
Health begins with a positive attitude. We all have so much for which to be grateful. While feedback is always appreciated, negativity isn’t tolerated. I’m glad you went elsewhere. And, if you change your attitude, you’re more than welcome to come back and visit us here at Healing Gourmet.
Kelley Herring
Kelly,
I loved your response enough to take the time to let you know. Trying your recipe tonight. I’m sure it will be fantastic.
Happy New Year!
Its a while past this post but I agree with Denise’s comment supporting you. As a new IP user I’ve been trolling sites for advice and LOVE not only the recipes but that you take your personal time to respond timely to comments. I fail to understand that some people would be SO nasty to someone who gives their time to keep up on such a busy site. HELLO….?!
Hello Jan!
Thank you for your kind and supportive comment and for visiting Healing Gourmet. I hope you continue to enjoy our site and come back often.
Entitlement is a disease that I have yet to find a viable nutritional solution 🙂 The stance that one is “owed” something is a 180 degrees away from living a life of gratitude.
It’s contentious people like you who warm my heart and to whom I’ll always gladly reply, and even go out of my way to help, if I can. But for those in the entitlement camp, I can only offer crickets.
Wishing you well,
Kelley
How long would you cook a 5 lb roast?
And is there a reason you season after searing?
You can check Instant Pot tables by pound to determine 5 lb cooking time. Adding salt first can cause meat to lose juices; also if other seasonings (spices, herbs) are added prior to the sear, they can burn.
Wow, some people can’t find “joy” in anything!
I am so excited to try this! I just got an IP for Christmas and I think this will be my first meal made in it! Thank you for sharing all of your tips! I’m definitely going to cook it for the full time you suggested and thanks to others’ helpful comments, I’m going to use natural release to ensure a great texture. (fingers crossed!)
I used a 3-lb beef blade roast and it came out amazing! It was the best beef I have ever eaten – tender and full of flavour. After the roast was done (70 minutes then natural release for 30 minutes) I took it out and put a head of sliced green cabbage in the broth with the onions. I pressure cooked it for 10 minutes with immediate quick release, and I ended up with a mouth-watering dish: gorgeous meat served over flavourful, tender cabbage and red onions in a rich broth. Thank you for sharing this recipe – I don’t think I’ll be making roast beef any other way again!
I was so excited to try this recipe after trying several others that did not leave the meat as tender as I’d have liked. I followed it exactly as written, but forgot to turn the knob to venting, since I’m still so new to using the IP. I was hoping for a perfect dinner after returning from church and found the message “burn” waiting for me! So the meat was tough, but tasty and the parsnips and carrots were perfect. I had to cut off the burned part of the meat. I cooked a jar of savory beef gravy and poured it over the meat. I was pleased that my mistake did not mean we had to resort to hotdogs. I’ll try it again later. Thanks for the free downloads of cookbooks you provided.
Hi Lori,
Ouch! Yes, settings can be tricky when you are just getting started. I’ve left the vent open before, as well 🙁
If you don’t have the valve closed the Instant Pot cannot reach pressure and cook properly.
I hope you give it another go!
Kelley
Hi. I know this is kind of an opld post, but i see it’s still active as of Dec of last year.
That being said, I have a rump roast available to try, do you suggest a different cooking time with this cut of meat?
Thanks!!!
Hi Caroline,
We are still active with this!
I have used a rump roast and it turned out great. Key thing is size – if your rump roast is larger than 3 lbs. you may want to extend cooking time a bit. The Instant Pot guide suggests 20 minutes per pound.
Hope you enjoy!
Hi Caroline,
We are still active with this!
I have used a rump roast and it turned out great. Key thing is size – if your rump roast is larger than 3 lbs. you may want to extend cooking time a bit. The Instant Pot guide suggests 20 minutes per pound.
Hope you enjoy!
Great idea
I had a 2.5lb sirloin tip roast. I set manual setting for 50min and did a full natural release. Roast was dry.
Hi Kim,
Sirloin tip roast is not the same as pot roast. Each cut of meat is a bit different with regards to its fat content, toughness, etc . This recipe was designed for “pot roast” and also works well with “bottom round roast” and similar cuts.
Hello Kelly, thank you for the recipe! I have been struggling with cooking meat in my Instant Pot, so this is helpful. Just in case other readers who live in high altitude are having trouble, I added 14 minutes of cooking time with a 2.6 lb. chuck roast at a little over 6,000 ft. altitude, a 20% time increase. It took a while to figure out that the altitude affects cooking time so much. It came out perfectly delicious and tender.
I was sceptical about cooking a roast in the Instant pot. I followed your directions exactly and it was perfect!
So glad you enjoyed it, Janna! And thanks so much for taking the time to let us know
I have both a Crock Pot pressure cooker and an Instant Pot. Tried 3 pound chuck in one and 3 pound bottom round in the other. Went thru standard cooking per books that came with pots. Roughly 50 minutes, add veggies and cook 10 minutes more. Release pressure value. Result was a dry and tough meat in both cases. Far from fall apart and moist which I was hoping for. Very disappointed.
From reading the various comments sound like I need to cook a lot longer. However when the meat was done in both cases my instant thermometer read 190 degrees internal temperature which under normal cooking conditions would be Very Well Done! Wondering if the meat might be a lot better if I just cooked slowly for 8 hours??
Comments of actual experience of successful results would be much appreciated.
Hi David,
It sounds like you used the Instant Pot’s recipe found in their book… and not the one we posted here?
You can read the comments and actual “successful results” of this recipe below.
Kelley
Kelly, first let me say I like your site very much especially the logical way it is organized, the great photos and clear instructions. What I followed was the Instant Pot directions and separately the Crock Pot directions. Your approach has it cook longer and on “Manual”. I had mine on “pressure cook”. Would that make a difference? Other than that quite similar. I would love to have the same result you have.
Hi David,
Thanks so much for the kind words and for taking the time to comment.
I’m a big proponent of recipes that work and want our visitors to get excellent results – every time. With the Instant Pot, settings really are everything! “Manual” and “HIGH” pressure are essential to make this recipe work. Tough cuts of meat require higher pressure and longer time to break down their fibers. I’m guessing your “pressure cook” setting may have been LOW pressure. This would definitely explain the tough results.
What model Instant Pot do you have? I can see if I can find the equivalent “HIGH” pressure for this recipe on your machine.
Be Well,
Kelley
I just cooked a pot roast with barbeque sauce, homemade hot sauce & onions. Then, after 60 min of pressure cooking, I added pinto & black beans, organic corn, & chopped chilis. Pressure cooked for another 20 min. Wow, so good. Something different than grandmas same old Sunday pot roast with potatoes & carrots.
Hi Valerie!
Yum – that sounds so good – I love the BBQ twist. I’ll have to give your version a try.
Thanks for sharing and taking the time to let us know about your results!
Be Well,
Kelley
I didn’t pay attention to the weight of my meat, but 70 minutes wasn’t quite enough. Popped it in for 15 more minutes and it was perfect! The whole apartment smelled delicious while cooking, too! I didn’t have. bone broth, but I did have some Marmite so I stirred that into some veggie broth as my liquid. After cooking, the liquid is so delicious I could just drink it!
Hi Emily!
I’m so happy to hear you loved it. The Instant Pot is truly magical when it comes to making tender meats and flavorful broths.
Thanks for taking the time to comment and I hope you’ll come back and visit us soon.
Be Well,
Kelley
How many servings is this recipe? 12? Just want to make sure I’m calculating correctly-
Hi Lynn,
That’s right – we have used 12 servings here for the nutrition calculation.
Given the 12 servings, each serving will contain 22 g protein. Keep that in mind as you plan with regards to appetites.
Be Well,
Kelley
Absolutely delicious and very easy. I thought I’d do a quick taste of the remaining broth and omg, it was like french onion soup, couldn’t stop sampling 🙂
Hello Eva!
I’m delighted to hear you enjoyed it. I love to use the broth as the base for French onion soup – soo good!
Thanks for stopping by and taking the time to comment.
Kelley
We just had a pot roast supper at Denny’s last night and if this is as tender and tasty like I had, then Denny’s just lost a customer, because I will be making our own tomorrow night for supper.